HTML Javascript CSS Basics
Introduction
This is taking a look at just the basics of web design. However, there is enough information here to help you build your own webpage with headings, images, links and different fonts, colors and font sizes. It is surprisingly easy without having to write a lot of code to make a nice looking webpage.
HTML is the "computer language" or code you use to create webpages for your browser such as Chrome, Firefox, Internet Explorer, Edge or Safari. HTML stands for Hypertext Markup Language. Javascript is also a computer language used within HTML programs that creates dynamics on the web page that HTML can't do alone. CSS (Cascading Style Sheets) also used within HTML is the language used to change colors, fonts, size, create borders, etc. Javascript and CSS are both written within HTML code so it is important to learn HTML first. The good news is that it is not difficult to understand. You can check out CSS and Javascript in the menu at the top of this page.
HTML code can be written on any plain text editor such as notepad or you can use an especially designed text editor made for writing code. I will be using notepad since it's already on my computer and it's simple to use.
DO NOT USE WORD PROCESSORS SUCH AS MICROSOFT WORD OR OPEN OFFICE!
These word processors save documents with extra (hidden) characters. They will not work. Whatever text editor you use just make sure to save the file with an html extension instead of txt. Again, save your work with the html extension (or just plain htm), not the txt extension. If you're using notepad, to save your project, click on File in the menu bar, then Save As. In the 'Save As' window, go down to where it says 'Save as type:' and click in the drop down box, and click on All Files (*.*), then name your file with an html extension. Example:
mywebpage.html
(not mywebpage.txt)
Under the encoding drop down box, click on UTF-8, the preferred encoding format of HTML, (although I've been using ANSI which seems to work just fine). You can save your file to the default 'Documents' folder or change it to whatever location you like. When you save and name it, (with the html extension), just remember to observe where it is being saved so that you can find it later.
Also note that your webpage will open up on a browser window but it won't be on the internet unless you have first obtained a domain name and uploaded your page to a web hosting site. For example this site you're on is hosted by hostinger.com.
HTML program basics
The most basic required code for a simple HTML program is as follows:
<!DOCTYPE html>
<html>
<body>
  <p>Hello World!</p>
</body>
</html>
First of all you will notice all the 'less than' and 'greater than' arrows. These are used to surround HTML statements and commands. This is how your browser recognizes HTML statements. The beginning statement <!DOCTYPE html> is required to let the browser know this is an HTML program. The next statement <html> or 'tag' as these are called is the beginning of the program itself. The program will end with a similar closing tag </html>. Next we have the <body> statement. Notice the opening and closing tags (ex: <body> and </body>). The closing tags have an extra 'slash' in it. The main 'visible' part of your webpage will be written between the 'body' tags. The indentation is not necessary but helps to make reading the code easier. In this short program it will just say 'Hello World'. The tags identify the different 'elements' of an HTML program. An HTML program consists of these different various elements.
You can copy and paste this short program to notepad, or just retype it, and save it with a name of your choice. Remember to save it with an html extension, not txt. For example, you can name it: myprogram.html Then go to the folder where the program is saved and double-click it and it should open your default browser with a blank webpage showing Hello World! Example:
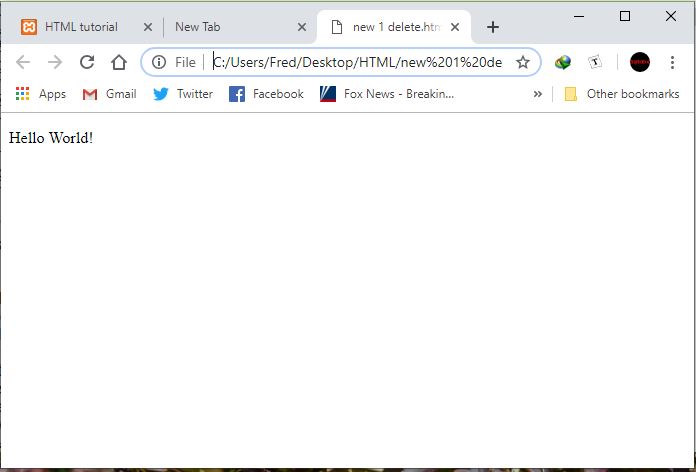
This is your first HTML webpage. Not a whole lot of information here but that's what the rest of this tutorial is about, adding large text, small text, colored text and backgrounds, images and more.
Elements and Tags
Between the opening and closing <body> tags of the above program we have
<p>Hello World!</p>
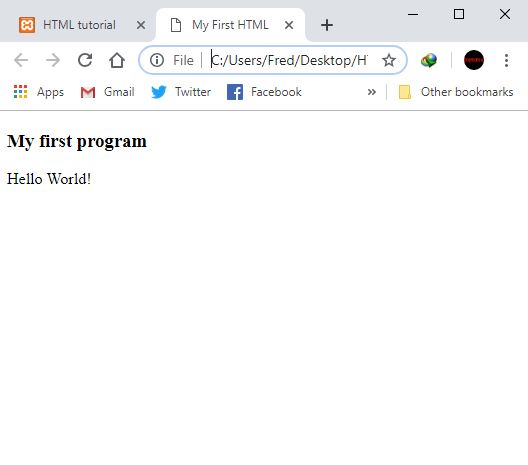
The 'p' in the tag stands for the paragraph element and this is one of the most common 'commands' you will use when writing a webpage. It is the main tag you will use to display written information. Remember to use the closing tag </p> when done with the written information. Observe that an HTML program basically consists of different elements with identifying tags, such as <p>, <html>, <img>, etc. There are several basic elements along with their tags to memorize when learning to write an html program. Some elements known as "empty" elements only have one tag such as the <br> tag, (line break). The common paragraph element <p> has already been discussed. Another common tag is the heading element denoted with the <h1> tag (or h1 thru h6). The <h1> tag is used for making headings for your web articles using larger and bolder text. For example, I used this tag <h3> to create the heading "Elements and Tags" in this paragraph you're reading. You can use h1, h2, h3, h4, h5, h6 with each one being a smaller text than the previous. Here is another example program using the 'heading' elements <h3> and </h3> and introducing the <head> element. Note that the <head> element has nothing to do with the 'heading' elements, <h1> thru <h6>:
<!DOCTYPE html>
<html>
<head>
    <title>My First HTML</title>
</head>
<body>
  <h3>My first program </h3>
  <p>Hello World!</p>
</body>
</html>
This will produce:
The opening and closing tags do not have to be on the same line. If you have a large composition to show on your web page then the closing tag will go after the composition, even if it is several lines after the opening tag. Also observe that the <body> tags are 'nested' within the <html> tags. In other words, the 'body' of the program is contained within the <html> tags of the program. As a matter of fact, 'all' the code in a particular program will be 'nested' between the opening and closing tags of <html>. The javascript tags <script> and </script>, used to denote javascript code, will be 'nested' between the <html> tags. There will be much more of this 'nesting' going on in a program, especially, larger programs.
The section beginning with <head> is different than the heading element <h1>. The 'head' section is used to include meta data and other information such as CSS code and Javascript code in your document. The <head> tag usually goes right after the <html> tag and ends with a </head> tag before the start of the <body> tag. Metadata defines document title, character set, styles, links, scripts, and other meta information. This won't be used often in our first simple examples but here is a code example of using the <head> tag.
<!DOCTYPE html>
<html>
<head>
  <title>My First HTML</title>
  <meta charset="UTF-8">
</head>
<body>
etc.....
</body>
</html>
Text Manipulation
Some other common HTML text manipulation tags are: bold <b>, italics <i>, line break <br>, pre formatted text <pre>, highlighted <mark> and strike thru <del>. The <pre> tag is used to keep original text format, for example a poem or song lyrics. The regular <p> tag eliminates extra spaces and lines from your text which wouldn't work in certain instances such as a poem or song lyrics.
For instance:
<!DOCTYPE html>
<html>
<body>

<p>
Roses are red
Violets are blue
Sugar is sweet
etc, etc, etc
</p>

</body>
</html>
Will produce:
Roses are red Violets are blue Sugar is sweet etc, etc, etc
As you notice, the whole poem is on one line, but if you use the <pre> tag intead of the <p> tag:
<!DOCTYPE html>
<html>
<body>

<pre>
Roses are red
Violets are blue
Sugar is sweet
etc, etc, etc
</pre>

</body>
</html>
Will keep the poetry form intact:
Roses are red
Violets are blue
Sugar is sweet
And so are you!
The font size on the 'pre' tag is smaller but that can be fixed with some CSS code. Just change the first "pre" tag to read like this:
<pre style="font-size:16px">
The word 'style' in the above code is the CSS word used to introduce CSS code. As mentioned in the introduction, CSS is used to change font sizes, colors, styles, etc.
Now, one could also just use the line break <br> tag with <p> like the following. If your poem or lyrics was long it might require adding a lot of line break tags, but it would produce the same results as above with the regular font size:
<!DOCTYPE html>
<html>
<body>
<p>
  Roses are red <br>
  Violets are blue <br>
  Sugar is sweet<br>
  etc, etc, etc
</p>
</body>
</html>
Roses are red
Violets are blue
Sugar is sweet
etc, etc, etc
More Tags
The bold <b>, italic <i>, highlight <mark>, and strike through <del> tags are self explanatory. Just put an opening tag before the word or phrase you want to change, and then put a closing tag after it. Like this:
<!DOCTYPE html>
<html>
<body>
  <pre style="font-size:16px;">
    <b>Roses</b> are red
    <i>Violets</i> are blue
    <mark>Sugar</mark> is <del>sweet</del>
    etc, etc, etc
  </pre>
</body>
</html>
Will produce:
Roses are red
Violets are blue
Sugar is sweet
etc, etc, etc
Links
Links are important because they help to navigate around the internet and around your own web page. HTML links are formed with the 'anchor' tag <a> and the attribute 'href'.
Example:
<!DOCTYPE html>
<html>
<head>
    <title>My First HTML</title>
</head>
<body>
  <h3>Introduction to poems </h3>
  <p>In this site we will look at poems. etc etc etc etc etc</p>
  <a href="https://www.any web site.com">Link to poems for kids </a>
</body>
</html>
Will produce:
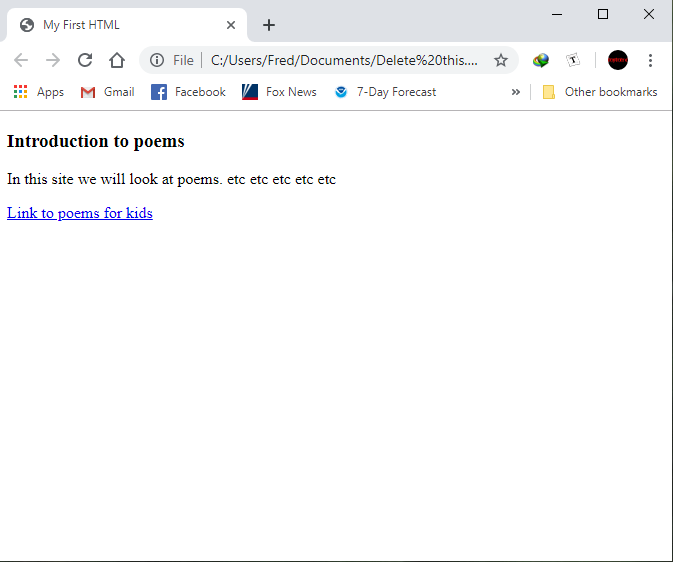
Notice that the link a person would click on is now blue and underlined. To have your link open a new tab, add the attribute target="_blank" in your link code like this:
<a href="https://www.any web site.com" target="_blank">This link opens in a new tab.</a>
You can also make a link to a different section of your webpage which comes in handy if your webpage is especially long. You do this first by giving the section you want to link to an 'id'. Put the 'id' in the heading of your section, for example:
<h1 id="music section">All about music</h1>
Now we can make a link to that section possibly from a menu bar. We use the # (hash) symbol in front of the id name to link to that area. For example:
<a href="#music section">Go to All about Music</a>
Images
Images on your web page are added with the <img> tag using the attributes 'src', alternate text 'alt', 'width' and 'height'. Example:
<img src="any picture.jpg" alt="alternate text if image is not available" width="107" height="156" >
The image element does not need a closing tag. To display an image, it must be in the same directory or folder as the HTML file is. If the HTML file is on the desktop, then the image must be available on the desktop. The following is an example of code for an image:
<img src="guitar.jpg" alt="picture not found" height="207" width="265">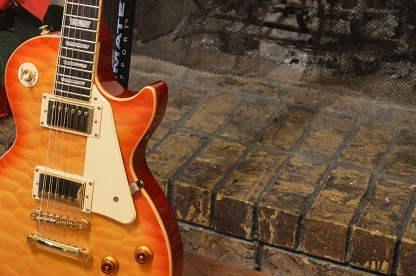
The 'alt' is for displaying any information that you want to put in there if the image is not available. You cauld either put 'image not available' or maybe a description of what the image was supposed to be, like 'red guitar on stand'
The width and height are in pixels. You can look at the 'properties' of your image you want to use and adjust the pixel size but be aware that if you change the ratio between the width and height your image may come out distorted. If you have a image that is originally 1000 X 500 then to make the picture half that size you would use width="500" height="250", keeping the same ratio between width and height. You can also use width="100%" height ="auto" which will display your image full screen but will automatically reduce in size according to the size of your screen. If you reduce the size of your screen the image will reduce with it.
If the picture is not in the same folder or is unavailable, then the text in the 'alt' attribute will be displayed. Example:
<img src="Joe and guitar.jpg" alt="picture not found" height="107" width="130" >

Also, do not have any spaces in the name of the image. For example, Joe and guitar should be named Joe_and_guitar.jpg or Joe-and-guitar.jpg. I discovered that my web hosting service would not display any images that had a space in the name.
If you want text that flows around the sides of your image instead of just underneath of it, you would use the CSS float attribute. For example in the above image code of the red guitar you would put:
<img src="guitar.jpg" style="float:left;padding-top:5px;padding-right:10px;" alt="picture not found" height="207" width="265">
Now your descriptive text will flow around the image. Also notice the 'padding' attribute. This is another CSS attribute to put spacing between objects. If this statement wasn't in there then this text would be crammed right up against the image which would not give a 'pleasing' effect. Again, if you want text that flows around the sides of your image instead of just underneath of it, you would use the CSS float attribute. If you want the image to be on the right side of your screen then you would use style="float-right; padding-left:10px" etc. You can experiment with the padding size to get more or less space between the text and your image. You could just put padding on one side, on top or bottom. If you just wanted to put padding on the right side of the picture you would put 'padding-right: 20px', or whatever number of padding you wanted. Same for left, top, or bottom.
Lists
Lists in your web page can be made with <ul> or <ol> tags (for unorderd/bullet or ordered/numbered lists), Example:
<!DOCTYPE html>
<html>
<body>
  <ul>
    <li>Coffee</li>
    <li>Tea</li>
    <li>Milk</li>
  </ul>
</body>
</html>
Produces:
- Coffee
- Tea
- Milk
(or numbered lists using the <ol> format instead of <ul> )
- Coffee
- Tea
- Milk
Comments
To make comments in your program that don't show on your web page, use the following open and close tags:
<!--
-->
Example:
<!-- use these tags for making comments in your code -->
Attributes
Many if not most HTML elements can have attributes, which gives additional information to that element. For example the <img> element, already described, has attributes of scr, alt, width and height. Attributes usually take on the form of attribute="value". Example:
<img src="any picture.jpg" alt="alternate text if image is not available" width="107" height="156">Another very common attribute is the 'style' attribute used to introduce CSS code which can change the style of text such as size, color or font. Example:
<p style="color: steelblue;font-size:20px;">Change color and size of text</p>
Change color and size of text
Notice that attributes go in the beginning 'tag' of an element. More attributes will be described as we learn about other elements...
Language
The language of the document can be denoted with the 'lang' attribute and goes in the <html> tag. Declaring a language is important for accessibility applications (screen readers) and search engines:
<!DOCTYPE html>
<html lang="en-US">
<body>
Title
The 'title' attribute is used to display a 'tooltip' or a descriptive phrase when you mouse hover over a word, sentence, image or other object:
Example<p title="I'm a tooltip">
This is a paragraph.
</p>
Now hover over the next sentence
This is a paragraph.
Also note that the 'title' attribute we just discussed is different than the <title> element which goes in the 'head' section. The <title> element in the 'head' section is what we use to give a 'title' to our webpage. When we open our webpage in a browser window the title we gave our program will show up in the tabs at the top of the page. For example the tab to the page you're reading right now should say 'Web Design Basics Tutorial' because that's the name I gave it.
Horizontal rule
Another element is the <hr> tag (horizontal rule) used for making a horizontal line (like the one above) in your page to divide different articles on your page, (no closing tag needed.) You can use the <hr> by itself to make a thin line or add some attributes, for example a style attribute and make it wider:
<hr style="border-width: 10px;">
'id' 'class' and <div>
The <div> element will be used quite often in your webpages. It is very useful in a number of different ways, one of them being to divide your web page into columns. To begin with, we need to give the <div> element an 'id' or a 'class' name...
The 'id' attribute is used to name an element with a unique 'id' name. We can then call upon this name in other parts of our code for the purpose of modifying, enhancing or completely changing the original element. More on that as we go on. The 'id' attribute goes inside a beginning tag like this:
<p id="somename"> I just gave this 'p' element an id</p>
The 'class' attribute can be used similarly to the 'id' attribute. They both are used for identifying certain content that you want to further modify, for example with CSS or Javascript. Example:
<p class="somename"> I just gave this 'p' element a 'class' name</p>
For example, in the body of your web page, you may want to change the color, size or font of certain sections. You may want to have your page divided into columns. One way of doing this is using a two part process. First, we need to section off or 'divide' the section we want to modify. Do this by putting a <div> tag at the beginning of the section and also at the end </div>. Now you can give this section an 'id' or 'class' name. Any name will do. Just put it in the beginning <div> tag, like this: <div id="somename"> or <div class="somename"> The div element is just used to divide your document into different sections that you may want to format differently. Now, this is where the <head> section of your code comes into use. We add the 'style' element with some CSS code in the head section to add the modifications we want. Here is some code using the 'class' attribute. We gave this class the random name 'mod'. It could have been anything we wanted to choose. Read the explanation after the code:
<DOCTYPE html>
<html>
<head>
<style>
   .mod{
      font-family:Times New Roman;
      font-size:25px;
      background-color:steelblue;
      color:yellow;
      }
</style>
</head>
<body>

<div class="mod">
  <p>
    Lots and lots of text.  Lots and lots of text.
    Lots and lots of text.  Lots and lots of text.
  </p>
</div>

  <p>
    Lots and lots of text.  Lots and lots of text.
    Lots and lots of text.  Lots and lots of text.
  </p>

</body>
</html>
Will produce:
Lots and lots of text. Lots and lots of text. Lots and lots of text. Lots and lots of text.
Lots and lots of text. Lots and lots of text. Lots and lots of text. Lots and lots of text.
Notice that only the part between the 'div' tags were modified. Starting from the top you will notice the standard beginning HTML tags. In the 'head' section we have a 'style' element. This is the element which denotes CSS coding. Notice the .mod statement that it begins with a 'period'. The word mod is not any special code name, it is just a name I gave the <div> with the 'class' attribute. I called on that 'class' attribute in the 'head' section under the 'style' element. Notice how the CSS code which modifies the class '.mod' is written between the 'curly brackets'. If we had used the attribute 'id' instead of 'class' in this example then we would have called on the 'id' name with a '#' instead of a 'period'. For example instead of .mod, you would write #mod. Whether you declared a 'class' or 'id' you would write your modifying code similarly in the 'head' section.
Now, if you use the 'id' attribute instead of the 'class' attribute, you should use that 'id' name for just one element and the modifying code you use will be for just that one element. Whereas the 'class' attribute name can be used over any number of times over different elements which you are desiring the same 'effect'. The 'id' attribute is also used in Javascript in their 'getElementById()' method, therefore, you should use just one name per element you want to identify. You can identify or 'name' other elements, but use a different 'id' name.
Columns
Different columns of text and images are created similar to how we 'float' an image to the right or left of the screen. (See the section on images above) You will usually start your webpage with no columns at the very top which will usually have your menu bar and maybe a title. For our purposes here let's just start with a title at the top. Then we will start with our first column. All the text and images for our first column will go between <div> tags. We should give our <div> tags a descriptive 'class' or 'id' name, like 'column1' and 'column2'. We will put the CSS code that arranges the columns in the head section under the 'style' attribute. Depending how many columns you use the widths all have to add up to 100% (the total width of your screen). If you add 'padding' to your columns, you may need to adjust the percentage width of your columns to a smaller number to take in the padding. Or you can use the CSS code 'box-sizing:border-box' in your 'style' definitions to take into account padding but keep the same width. We also need to put a 'margin' attribute in the <body> tag so that the text isn't going right up against the edges of the screen. Here is some sample code to explain how it is done:
<!DOCTYPE html>
<html>
<head>
<style>
  .column1{
    float:right;
    width:75%;
    padding:10px;
    box-sizing:border-box;
  }
  .column2{
    float:right;
    width:25%;
    padding:10px;
    box-sizing:border-box;
  }
</style>
</head>

<body style="margin:30px;">
<h1 style="text-align: center;">Creating a  2 column web page</h1>

<div class="column1">
<p>Text and images for the first 'div' element will go in this column. This is our first column and it was floated right. It has a padding of 10px because it it didn't, the text from both columns would be right up against each other. Notice in the width attribute that we gave it a width of 75%. The other column (also floated right) has a width of 25%. 75% + 25% equals the total width of the viewing screen. etc etc etc </p>
</div>

<div class="column2">
<p>Text and images for the second column will go in this part etc etc etc etc etc etc etc etc etc etc etc etc etc etc </p>
</div>

<div style="clear: both;"></div>
</body>
</html>
Will produce:
Creating a 2 column web page
You can display tables in HTML
<table style="width:50%">
  <tr>
    <th>Firstname</th>
    <th>Lastname</th>
    <th>Age</th>
  </tr>
  <tr>
    <td>Bob</td>
    <td>Jones</td>
    <td>32</td>
  </tr>
  <tr>
    <td>Bill</td>
    <td>Roosevelt</td>
    <td>59</td>
  </tr>
  <tr>
    <td>Jim</td>
    <td>Smith</td>
    <td>29</td>
  </tr>
</table>
Will Produce:
| Firstname | Lastname | Age |
|---|---|---|
| Bob | Jones | 32 |
| Bill | Roosevelt | 59 |
| Jim | Smith | 29 |
You have 'tr' for row, 'th' for header, 'td' for data. The 'td' element can contain various different elements, text, images, etc.
There are many things you can do to modify your table through CSS. You would give your table an 'id' then in the <head> section you would add a <style> section. (or do it on a separate style sheet described in the CSS page) Check out the w3schools website for more options with tables. HereButtons
Buttons on your web page are added with the <button> tag. There's not a lot you can do with buttons without Javascript but be aware of how to make one on your page. For example the following code uses the Javascript function 'alert':
<button type="button" onclick="alert('You clicked me')">Click me</button>Forms
Forms are what we use to interact with someone who may visit our webpage. For example we can obtain information such as name, address or email from them. They can leave a message or comment through forms. It's important to remember though that retrieving information from forms requires using a different program, usually on a server and with the computer language PHP, (though there are others). Here is a basic layout of the form element:
<!DOCTYPE html>
<html>
<body>

<form method="POST" action="handling program.php">
  Enter name:
  <input type="text" name="first input"/><br>
  Enter age:
  <input type="text" name="second input"/><br>
  <input type="submit" name="submit" value="Submit!" />
</form>

</body>
</html>
Will produce:
The first line of the form element contains two attributes, 'method' and 'action'. The 'method' can be either 'POST' or 'GET'. 'POST' is the more secure way. For more details on this see w3schools.com. The other attribute, 'action', tells the form where to send the information that was entered. This would naturally be the ip address of the server program on your computer. Apache is a common server program that would be installed on your computer to accept information sent from visitors that are viewing your web site. There is a separate tutorial on how this works. Moving on to the next lines, we have the input elements. Input elements usually have at least two basic attributes, 'type' and 'name'. There are several input types but the main ones we are interested in are 'text' and 'submit'. 'Text' just means the input will just take plain text. The 'name' attribute gives a variable name to the information submitted. In this case, the variables are 'first input' and 'second input'. We could have given them any random name. The 'submit' type puts a button on the page and once clicked submits the information to the address in the 'action' attribute. If you hit the submit button in this example it will just give an error because there isn't a 'action' page set up.
For a more comprehensive view of web design there are many tutorials on the web, such as:
W3Schools websiteMDN web docs
The Site Wizard
Go to top

Corner
Notes
Just some side notes, I learned much of this information from the w3schools.com website. I will include a link here (opens a new tab). I find learning HTML interesting and entertaining. I've made some of my own tutorials to help me to remember the information. I'm writing this website from scratch as opposed to using an "already made" website like Wordpress. This is just 'scratching' the surface, like Elvis the rooster is doing, but it can get you started to make your own webpage.
Note that 'Javascript' is not the same as 'Java' which is a different unrelated computer language.
Here is a link to a 'Practice your Times Table' program I made while learning Javascript. It's stuff you studied in grade school but, how well can you do? I got through them with no mistakes in 97 seconds.
Times Table Speed Test
More random tags
<b>
<strong>
<i>
<em>
<mark>
<small>
<del>
<ins>
<sub>
<sup>
<span>

<q>
<blockquote>
<abbr>
<address>
<cite>
<bdo>
More random notes:
Changing Link Colors
<style>
a:link {
  color: green;
  background-color: transparent;
  text-decoration: none;
}

a:visited {
  color: pink;
  background-color: transparent;
  text-decoration: none;
}

a:hover {
  color: red;
  background-color: transparent;
  text-decoration: underline;
}

a:active {
  color: yellow;
  background-color: transparent;
  text-decoration: underline;
}
</style>
Making a link like a button
<style>
a:link, a:visited {
  background-color: #f44336;
  color: white;
  padding: 15px 25px;
  text-align: center;
  text-decoration: none;
  display: inline-block;
}

a:hover, a:active {
  background-color: red;
}
</style>
Cetain characters are used for HTML code and if you print them in your document it may think you're wanting code instead of the character itself. To show the character as the character itself, use the following forms....
< <
> >
" "
' '
& &
no
break
space;
The 'disabled' attribute, commonly used in forms can be written as just plain disabled instead of disabled="disabled". For example:
<input type="text" disabled="disabled">
Can be written:
<input type="text" disabled>
'Disabled' grays out the text box....