Gimp Basics
Beginning
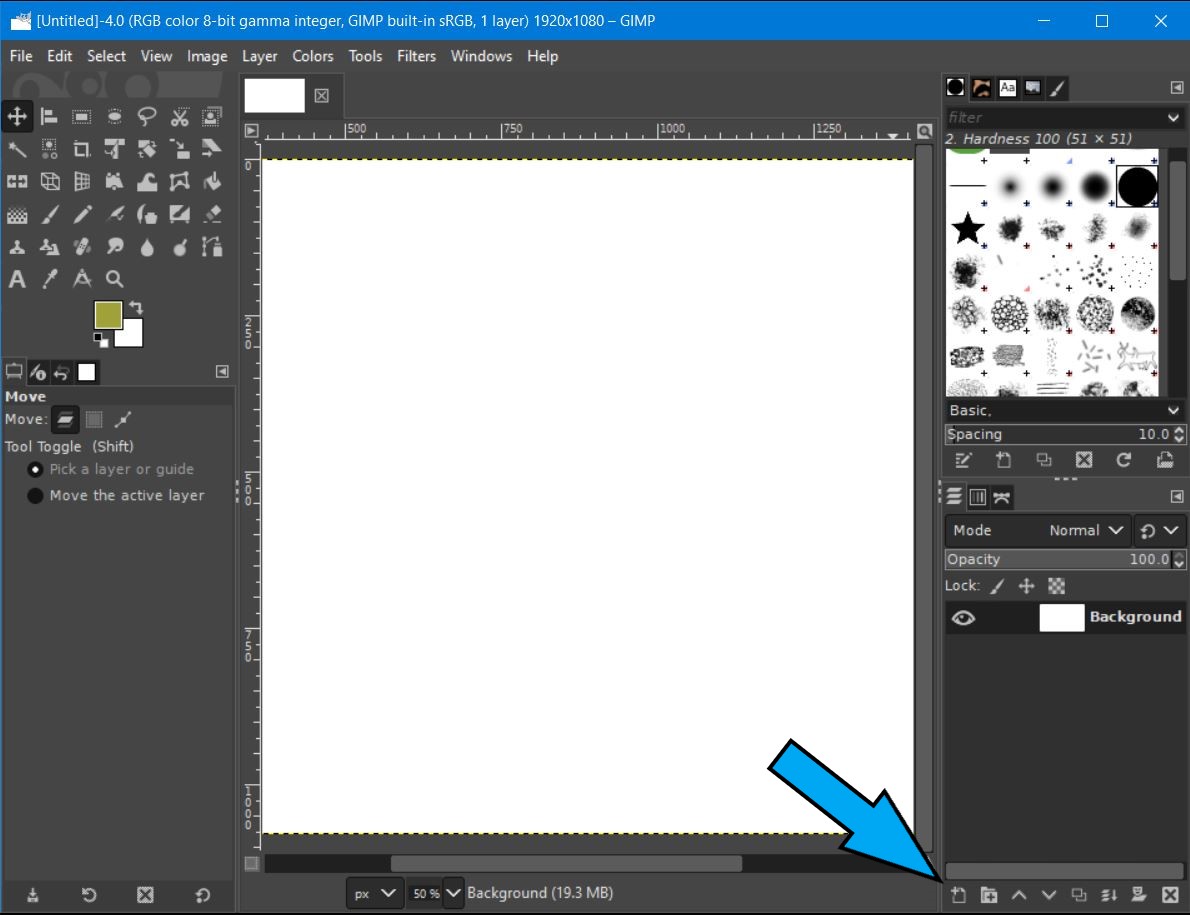
You can think of GIMP as a poor man's PhotoShop, except GIMP is anything but poor. It is free, but apparently it comes close to rivaling PhotoShop. I've never used PhotoShop but according to what I've read, GIMP is a close second. So let's see what it can do. After downloading GIMP from gimp.org and installing and running it, you will be met with a screen similar to the following.
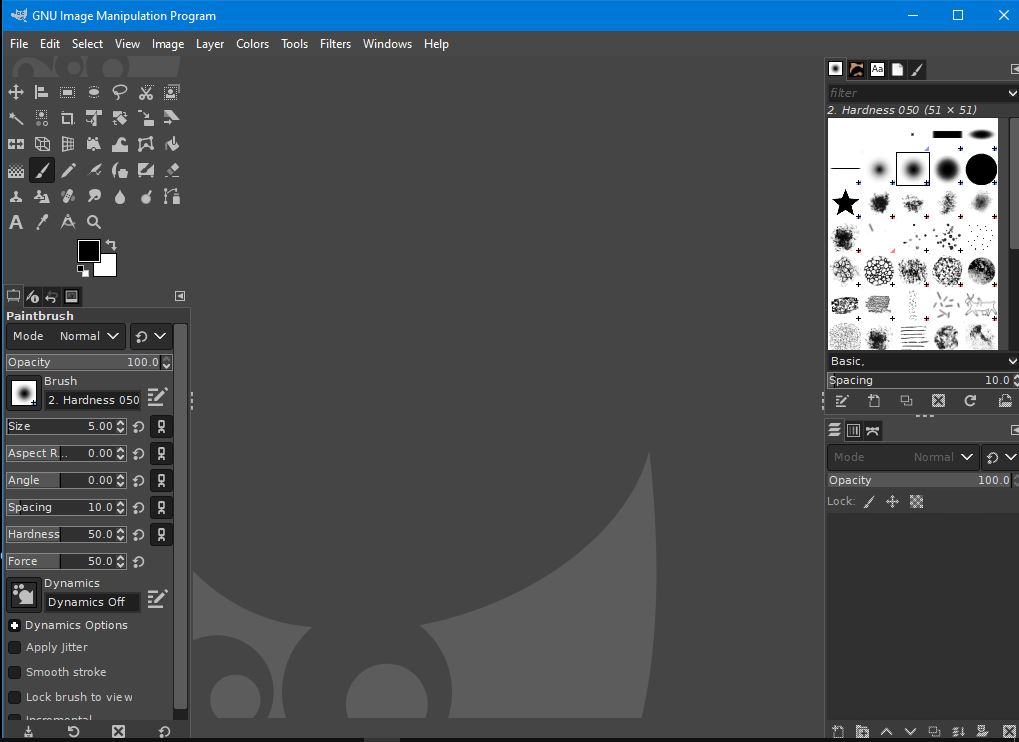
On the left side of the screen is what they call the tool box. The top part is where you pick the tool and the bottom part is where you can adjust the settings of that tool. Your image may not show as many tools as this image because I've changed the format to show all the tools. The newer version of Gimp (I'm using 2.10.28) now puts several related tools in one icon or group. You can change that, like I have, in the preferences window to display all the tools separately. Also if you click on some of the tools it will bring up the different options or adjustments to that tool in the bottom section. My screen may be showing more than yours because I have selected the 'ellipse tool'.
The center of the screen is where your image you want to work on will be. Once you drag and drop an image in the middle screen, or open it from the file menu, you can drag the image around by clicking the MIDDLE mouse button.
At the top right side are several default tabs for the brushes, patterns, fonts, document history, and other items that you can dock there. We can bypass most of this for now. Some of these are also available from picking one of the various tools in the tool box. The bottom right side is where some important actions take place. It's the 'Layers Channels and Paths' section. It's kind of difficult at first to see where the section starts, but it is where the three icons that represent the layers, channels, and paths is situated. See the examples:

The layers section, which you get by clicking the first icon, is what you will be using the most. Might as well click on it now to make sure you're in the layers section. It's the one with the 3 horizontal bars. (The icon clear on the right side is just a configure tab)
First Project
The best way to learn Gimp is to just start using it. Before we get into editing photos let's start by using some of the basic tools and creating a design or shape. First we want to make sure we're getting a nice white canvas to create a shape on. We do that by looking at the 'Foreground/Background icon' located right under the tool section but above the tool options section. Yours may have different colors but it basically looks like this:

The left little square inside the icon (mine is black) is the foreground color and the right little square (mine is white) is what they call the background color. We can change the color of these squares by clicking on them. We want our canvas to be white (or any color you want) so click on the right little square and it will bring up a color selector menu.
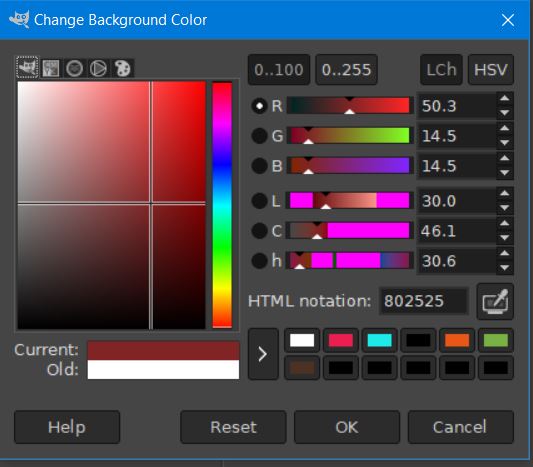
Use your mouse to find the color you want and click on it. In our case we want a white canvas. The very top left corner in the color box should get you white and the very bottom right side should get you black. After getting the color you want, click ok. (Sometimes you have to click the reset button to make it change) Let's change the foreground color also by clicking the left little square of the Foreground/Background (FG/BG) icon. Make it something colorful other than black or white.
Now that we have the correct color for our background on the canvas, open 'File' from the menu bar at the top and click on new. This will open a dialogue box which you can adjust the size of your canvas. Mine says 1920x1080 but yours may be different. You can leave it as it is or change it to whatever you want. When you have it to the size you want, click ok. Now you should have a nice white canvas to work on in the center screen and you'll notice on the right side in the layers section that an image appeared with an 'eye' and a small rectangle representing this layer. If you don't see this make sure that the layers icon is clicked as mentioned above.
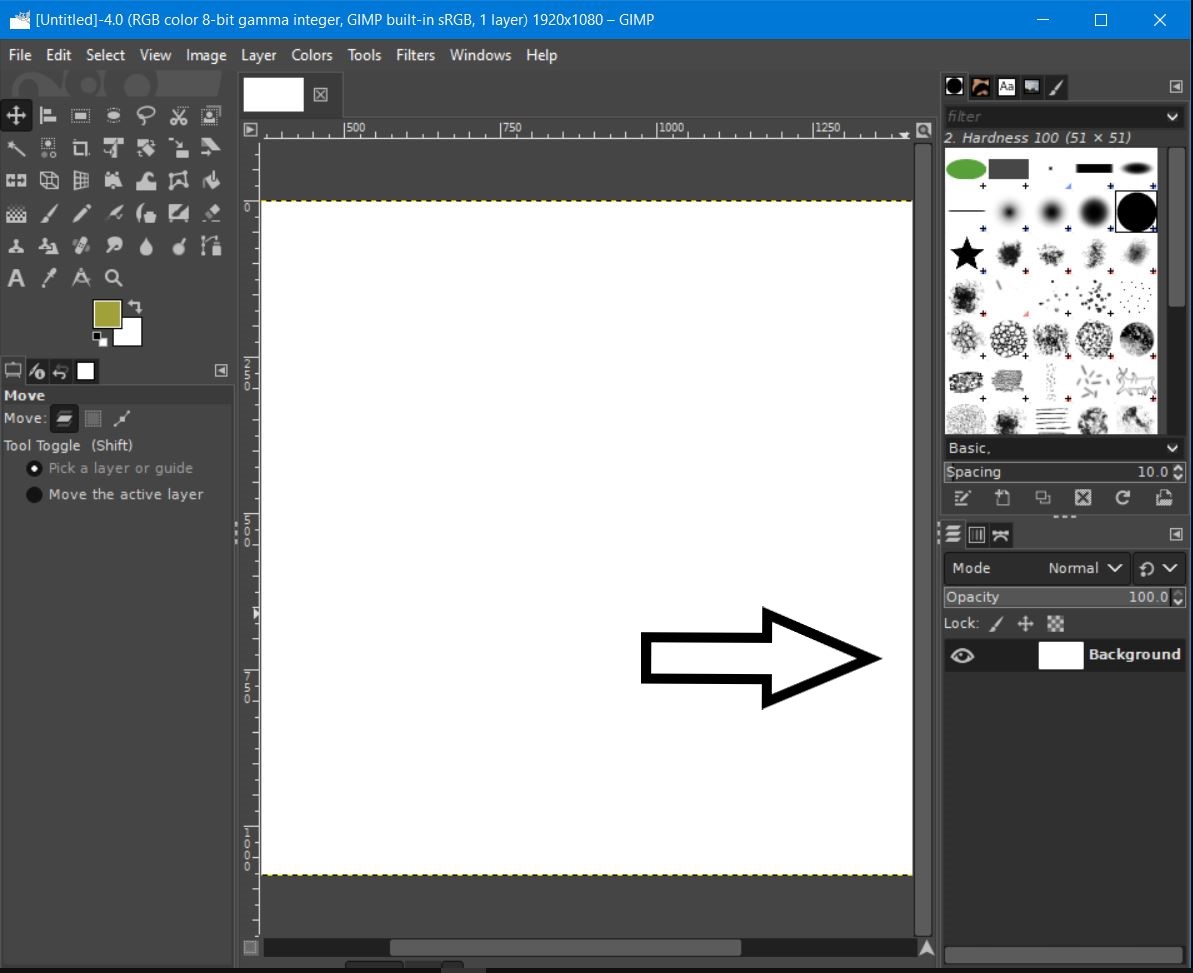

This represents the image (layer) you just created. You can change the name 'background' by double clicking it and naming it something more meaningful to you. If you click on the 'eye' it will make your layer invisible and if you click on it again it will re-appear. This is useful when working on multiple layers and you want to see just certain ones.
Also, if you click on the small rectangle to the right of the 'eye' it will select the layer you want to edit. This is important if you have more than one layer. So, if you're working on multiple layers, you need to click this image along with the 'eye' on the layer you're working on so that it will be the one receiving your editing. Otherwise your editing won't take effect.
Creating a Shape using Layers
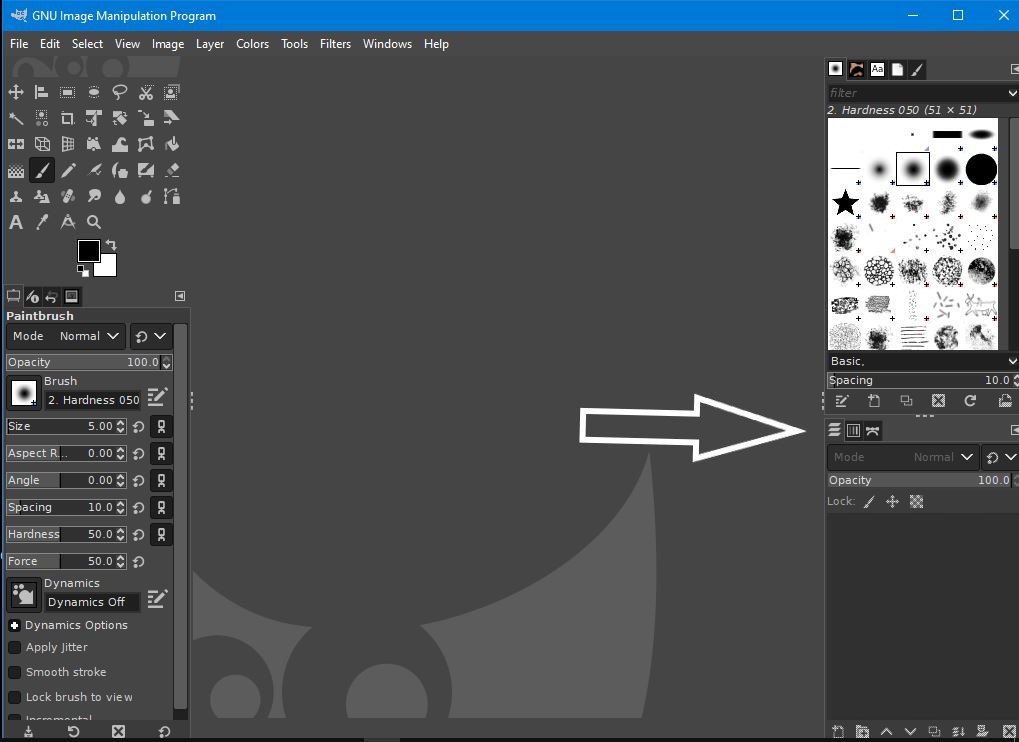
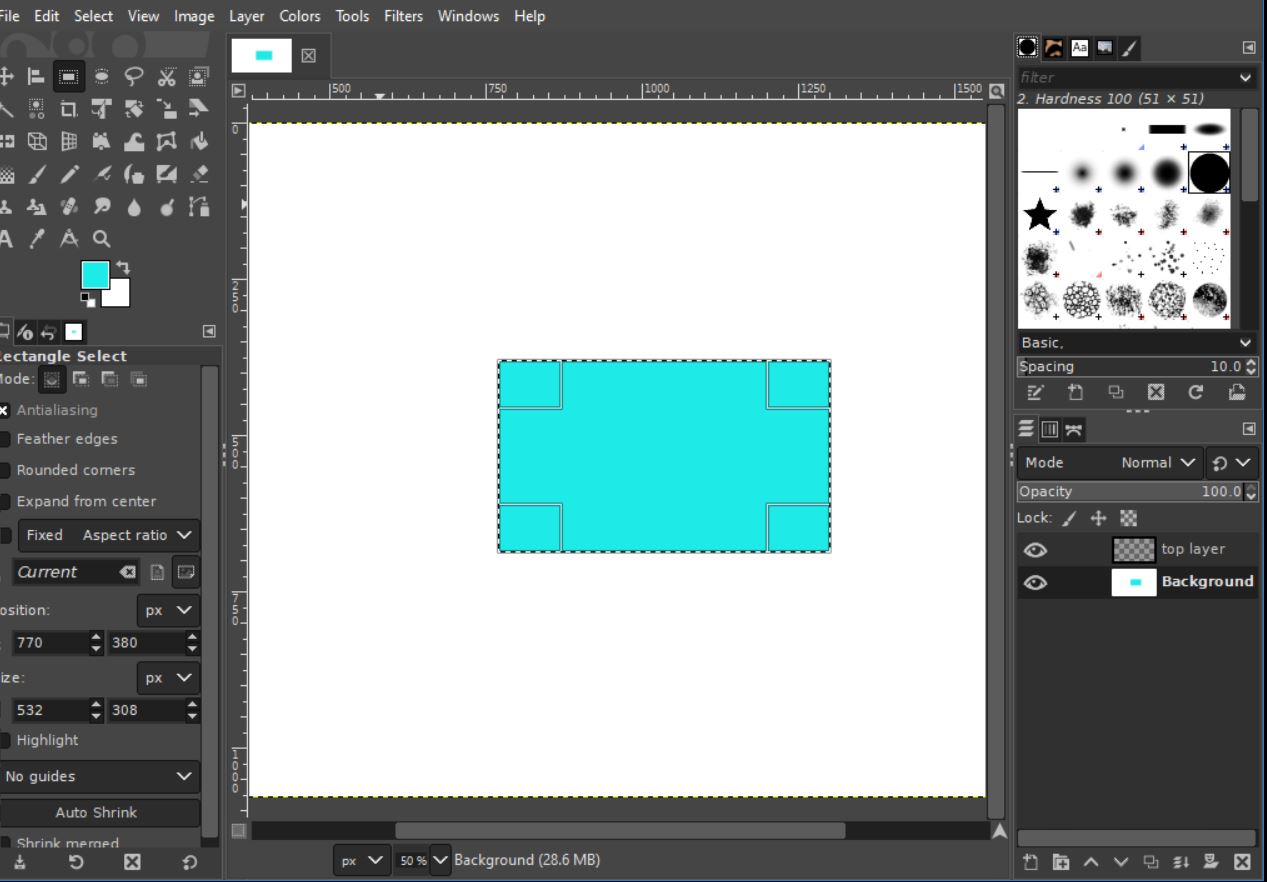
Now will be a good time to create another 'layer'. We can create a shape directly on our canvas but it would be better to create another 'see-thru' layer (canvas) on top of the first layer and create our shape on it. Doing this is the heart and soul of GIMP (and PhotoShop). It makes it much easier to move objects around and delete them if they're not working out. To create another 'invisible' layer go to the bottom of the layers section and click on the very first icon that says 'Create a new layer and add it to the image'.
See arrow pointing to correct icon:
On the window that pops up, make sure that 'Fill with:' says Transparency. You can change it to a solid color but then we wouldn't see the canvas underneath. For this particular project we want it to be transparent. Now click ok and you'll notice another layer appears in the layers section that says 'top layer'. Again you can rename it if you want. You can click and drag these layers so they change positions but right now we want the top 'invisible' layer on top.
The Rectangle Select Tool
Back to the top left side, the toolbox, one of the first basic tools you'll use is the Rectangle Select Tool. Hover your mouse over the different tools until you find the Rectangle Select Tool. It should be in the top row. Click on it to select it. If it is in a group you may have to right click the group to select the tool you want. With the Rectangle Select Tool you can left click on your image, drag and create the outline of a box any size you want. Some of the examples you can do with this is to highlight or select areas you want to work on, crop an image or just create a box for design or text. We will be making a box. So go ahead and create the outline of a box (or rectangle) on your canvas. Next, go up to edit (or right click on your image and click edit) and click on Fill with FG Color. (This is about half way down on the popup window) This fills the box with your ForeGround color which is whatever you changed it to at the beginning.
Now if you go over to the layers section and click on the 'eye' of one the layers, you can see that it hides a layer or makes it back visible. If you click off both layers you will see a kind of checkerboard with dark and light squares at an angle. This represents transparency or 'see-thru'. It's also the 'alpha' of alpha channel. More on that in a bit.
The Ellipse Select Tool
Now let's create another layer like we did the last one. This layer will automatically go to the top of the layer stack. If not, you can click and drag it to where we want it (which is at the top). Now let's go find the Ellipse Select Tool in the tool box and click on it. This tool, like it sounds, will create ellipses and circles. First, make sure that your top layer is selected by clicking on the top miniture rectangle in the Layers section. Now, to create an ellipse, click and drag with your mouse on the canvas. Let go of the mouse button when your shape is how you want it and where you want it. Now you can click on edit, go down to where it says Fill with FG Color and click that and your FG (foreground) color will fill your shape. (Just like we did with the Rectangle Select Tool.) To make a perfect circle, click and drag with the tool on the canvas the approximate shape of a circle where you want it. Before releasing the mouse button, click and hold the shift key and then let go of the mouse button. Now you should have a perfect circle. You can fill it with the FG color as before. If you desire for the shape to have a different color, change the color of the FG/BG icon before you click on the Fill with FG color. Actually, you can fill it with the background color but make sure it's a different color than your original canvas or you won't see it.
Stroking the Selection
You may not want to fill your shape with a color but just have an outline of the shape. To leave a permanent outline of the shape you need to 'Stroke the selection'. Do this by again clicking on edit after you've outlined a shape and go down to where it says 'Stoke selection...'. A popup menu will appear and give you options on width, style of line you want to use, paintbrush or pencil, etc. The color will be the color in the foreground part of the FG/BG icon you've chosen. Once you've chosen all of these click on 'Stroke'. If nothing appears make sure you've made the line wide enough and that it is a color that doesn't blend in with the background.
Note: To zoom in or out of your project, you can hold CTRL and scroll with the mouse wheel.
The Bucket Fill Tool
We've been filling our shapes from the edit menu but you can also use the Bucket Fill Tool in the tool box. It's pretty straight forward on how to use it. To fill a shape with a solid color, left click on the selected shape you just created with the bucket fill tool and the color that is in the foreground of the FG/BG icon will fill it. It's important to note that this will fill the area that was last selected. If an area you want to fill is not selected it won't fill or may fill something unexpected.
Using the Move Tool
You can use the Move Tool to move these objects you created around on your canvas. Make sure that the object you want to move has it's layer selected. You just basically click on the object you want to move and drag it to a new position. This is where GIMP can get a little confusing, that is, remembering to click on the layer that is located in the Layers Section that you want to move or edit. For example, we now have three different layers in our project. The bottom layer of the stack is our white background layer. The middle layer is the one where we created a rectangle or box. The top layer is where we created an ellipse or circle. You can think of these layers as thin pieces of glass laying on top of each other. The bottom layer is painted solid white but the layers above it are transparent except for the shape that you created on them. You can move these upper pieces of glass (layers) around which will move the shapes you created around. They will still look like they're sitting on a white background. The shape that moves depends on which piece of glass you grab hold of. The same thing is with these layers on GIMP, you have to select the layer that has the object or shape you want to move. You will be able to see the outlines of the transparent layers you are moving but they will not be visible in the final product.
Gradients, FG/BG
A gradient is just a certain color that starts on one edge of a shape and then gradually fades and shifts to another color on the other side of the shape. The basic operation of the gradient tool is related to the colors in the 'Forground/Background' (FG/BG) icon in the lower section of the toolbox. If you click on one of the little windows you can change the colors. If you click 'X' it will switch the colors in the windows. (Or just click on the upper right section of the icon).
Gradient

This can make a nice background for text, shapes or whatever you want to use it for. To use the gradient tool, just select it and then go down in the tools option and click on the little sample gradient right under where it says 'Opacity'. Here you have options of how you want your gradient to look. The first option that says custom looks like it just uses the colors in the FG/BG icon. Experiment with the different options and once you've chose an option, left click the mouse on an inside edge of a shape you have just created and drag across the image, let go of the mouse button when finished. You can make your whole blank canvas a gradient if you like. There is much more you can do with gradients but is beyond the scope of this basic tutorial to get too detailed.
Some quick editing tools
If you create or draw something on a layer and want to delete it, you can use the rectangular select tool and draw around it and then hit CTRL X (control X) to delete it. CTRL C copies, CTRL X cuts, CTRL V pastes, CTRL Z is undo and CTRL Y is redo. These are pretty normal editing tools with any software. But note that this works well on shapes that were created on a transparent layer (alpha layer). It may not work as expected on photographs or pictures. Always make sure that you have the correct layer selected before deleting something. If not, you can always use CTRL Z to undo a mistake.
Remember that with the FG/BG icon, whatever color is in the FG part will be the color that is used by the paintbrush, pencil, etc.
CTRL i inverts your selection. Useful when cutting out objects in your picture project. In other words, let's say you have an object you want to remove from a canvas. If you trace it, select it and click delete you remove the object. But let's say you want to remove the background instead of the object. Now you can hit CTRL i, and when you hit delete, the background will be removed.
Picture Editing, Cutting Out an Object
When discussing cutting out objects from a picture, there are several different ways of doing this. One way is using what they call a 'mask' or 'layer mask' and another way is tracing around the object with the paths tool. A layer mask is kind of like laying an invisible layer over your picture. When you draw over it with a paint brush or similar tool you picked out of the toolbox, it will either erase that part of your picture or if you switch colors, add it back in. The colors that are used are white and black so make sure that your FG/BG icon has these colors in it. To add a layer mask, right click on your picture in the layers section and click 'Add Layer Mask' from the popup menu. The next popup you can just click on 'Initialize Layer Mask to: white (full opacity), then click add. Right click on the layer again and click 'Add Alpha Channel'. Now when you use a paint brush or pencil you can start painting over the section of your picture that you want to remove. If black is in the foreground section of the FG/BG icon it will remove (erase) that section of your picture. If white is in the foreground section then it will paint back in a section you might have accidentally erased. To quickly switch the colors in the FG/BG icon, hit x on your keyboard. The idea is to paint over the section you want to blank out until all you have left is the object you're wanting to cut out and keep. This may require some careful movement of your brush and changing the size to get into tight areas to get good results. A quick way to change the size of your brush is using the keyboard shortcuts, the brackets [ ]. One increases the size of your brush, the other decreases. When you're finished cutting your image out you can copy and paste it into another background or picture.
You can also use the paths tool to draw an outline around the object you want to cut out. (Make sure you've added alpha channel to your image from the layers section) Just keep clicking around the object with the paths tool and left mouse button and the dots (or nodes) will connect to each other. The lines can be curved. It's best to click a little bit inside the edge of the object you want to cut out. When you get back to the beginning, place your mouse pointer over the first node and press CTRL and left click the mouse. This will join everything together (I guess) Or, just click the last node up against the first node. Now we have to select the image. You can right click in the image you want to cut out. In the popup menu click 'select' and then 'from path'. Or you can go over to the layers menu section and click on the paths icon, then right click on the image in the layers and click 'paths to selection'. (The first way is easier) Now there's several different things you can do depending on your goal. You can hit delete to remove your image or if you hit CTRL i, it will invert your selection and now you can delete the background. Also take note of the 'Layers Channels Paths' section, that at the top are the 3 icons that represent Layers Channels Paths. If you click on the paths icon a popup menu will appear. From here you can choose common tasks like 'Path to Selection', 'Fill Path', 'Stroke Path' and others.
Quick Mask
Another way to use a mask to remove or cut out sections from an image is the quick mask. After loading in an image you want to edit, press shift Q on the keyboard to start the quick mask. You can also click the little square button at the bottom left corner of the view window (just to the left of the bottome scroll bar). This places a red transparent 'film' over your image. Now with the erase tool from the toolbox, begin to erase the red layer off of the section you want to cut out. If you've accidentally went too far over a line you can use the paint brush to brush it back in. Then go back to the eraser to finish the edit. A quick way to increase or decrease the size of your eraser is to use the right and left bracket keys.[ and ]. After you're finished erasing the image you want to cut out, toggle the quick mask off by clicking shift Q or clicking the button at the left bottom of the view screen. Now just hit delete to remove the image you just erased. Or, if you want to keep that image and erase the background, click CTRL i (or invert from select on the menu bar) then click delete. If you've accidentally deleted the wrong thing, just hit CTRL Z and it will bring it back up.